Difference between revisions of "Web Application Creation Tutorial"
(→Part two: Web Application Creation) |
|||
| Line 7: | Line 7: | ||
* [http://tomcat.apache.org/download-60.cgi Tomcat Download Link] | * [http://tomcat.apache.org/download-60.cgi Tomcat Download Link] | ||
| − | === Part | + | === Part 1: Task Creation === |
For this example we will create a simple application that asks the user's name and then returns some information about the name. For this we will need two Tasks which: | For this example we will create a simple application that asks the user's name and then returns some information about the name. For this we will need two Tasks which: | ||
| Line 22: | Line 22: | ||
Try it out. You won't be very impressed, but if you can submit the form and receive a suitable response then it is working which is the main thing. | Try it out. You won't be very impressed, but if you can submit the form and receive a suitable response then it is working which is the main thing. | ||
| − | === Part | + | === Part 2: Web Application Creation === |
The next step is to create our WAR file which we will later deploy to our Servlet Engine. | The next step is to create our WAR file which we will later deploy to our Servlet Engine. | ||
| Line 39: | Line 39: | ||
We will call our WAR file "nameanalysis.war" and save it to the root of the C: drive. If you want to call it something else, or save it elsewhere, feel free to do so - just remember where you put it as you'll need it later. | We will call our WAR file "nameanalysis.war" and save it to the root of the C: drive. If you want to call it something else, or save it elsewhere, feel free to do so - just remember where you put it as you'll need it later. | ||
| + | |||
| + | === Part 3: Deployment === | ||
| + | |||
| + | The final part of the exercise is to deploy our Web App to our Servlet Engine. If you are using Tomcat this will be very straightforward: Just drop the newly created WAR file into the "webapps" directory within "tomcat". Assuming that Tomcat is running it will automatically extract the archive file and the web application should be immediately available. As you can see in the image below, a new directory matching the name of the WAR file has been created, which contains the extracted contents of the WAR file: | ||
| + | |||
| + | http://www.international-presence.com/wikidocs/images/deploy_tomcat.png | ||
| + | |||
| + | Once this is done, you can browse to your application using the following URL: | ||
| + | |||
| + | http://[server name]:[tomcat port]/nameanalysis/task/requestName | ||
| + | |||
| + | If all has gone well you should now see the output from the Name Request Task and the form should work as it did when running through the Presence HTTP Server. The difference is that Presence is no longer involved in running the Tasks, this is done entirely within Tomcat. | ||
Revision as of 13:32, 12 July 2010
This document describes the processes needed to create and deploy a Presence Web Application.
Contents
Prerequisites
For this tutorial you will need to install and run a Servlet Engine such as Tomcat:
Part 1: Task Creation
For this example we will create a simple application that asks the user's name and then returns some information about the name. For this we will need two Tasks which:
- Display a page requesting the user's name
- Display a page showing information about the user's name
In a real world example both of these pages could be generated by a single Task, but we want to demonstrate multiple Tasks being used by a Web Application. The Tasks can be downloaded from here. Go ahead and extract the zip file then import the XML file into Presence.
Once imported, you can test the functionality by running the Presence HTTP Server then directing your web browser to the following URL:
http://[server name]:[http port]/task/requestName
Try it out. You won't be very impressed, but if you can submit the form and receive a suitable response then it is working which is the main thing.
Part 2: Web Application Creation
The next step is to create our WAR file which we will later deploy to our Servlet Engine.
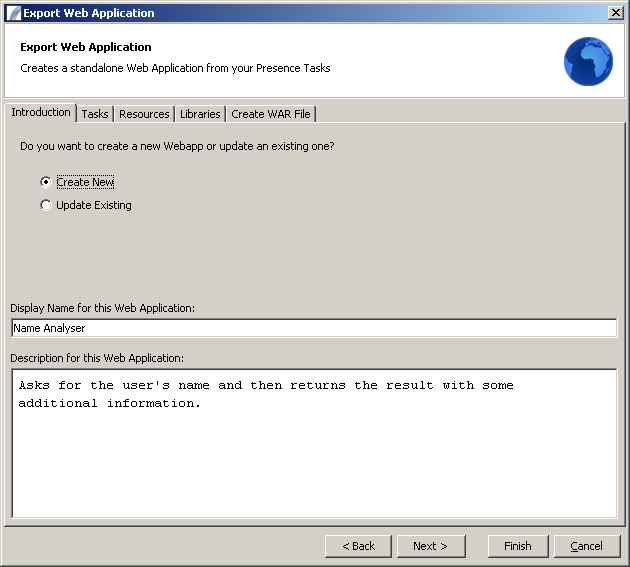
In the Presence Administration Client select Tools > Create Web Application from the top menu. You will then be presented with the first screen of the Web Application Wizard. Complete this information using the example below as a guide:
http://www.international-presence.com/wikidocs/images/webapp_1.png
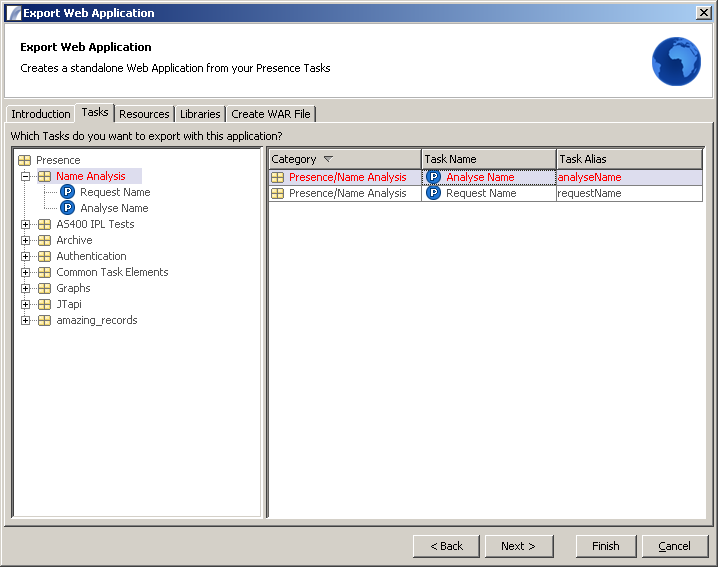
Click "Next >" to specify which Tasks you want to include in your Web Application. Drag the Category containing our two Tasks into the right-hand Table. Aliases will be autogenerated, but you can change them by right-clicking on a Task and selecting "Change Alias" from the pop-up menu:
http://www.international-presence.com/wikidocs/images/webapp_2.png
Click "Next >" to view the Resources screen. This project doesn't require any external resources, but if you need to include things like images and style-sheets then this is the place to do it. Click Next again to proceed to the Libraries screen. Again, we shouldn't need any external libraries for this project so you can skip this screen as well and proceed to the "Create WAR File" screen:
http://www.international-presence.com/wikidocs/images/webapp_3.png
We will call our WAR file "nameanalysis.war" and save it to the root of the C: drive. If you want to call it something else, or save it elsewhere, feel free to do so - just remember where you put it as you'll need it later.
Part 3: Deployment
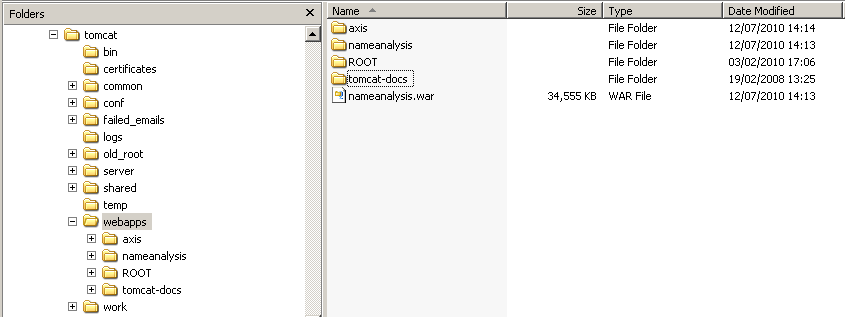
The final part of the exercise is to deploy our Web App to our Servlet Engine. If you are using Tomcat this will be very straightforward: Just drop the newly created WAR file into the "webapps" directory within "tomcat". Assuming that Tomcat is running it will automatically extract the archive file and the web application should be immediately available. As you can see in the image below, a new directory matching the name of the WAR file has been created, which contains the extracted contents of the WAR file:
http://www.international-presence.com/wikidocs/images/deploy_tomcat.png
Once this is done, you can browse to your application using the following URL:
http://[server name]:[tomcat port]/nameanalysis/task/requestName
If all has gone well you should now see the output from the Name Request Task and the form should work as it did when running through the Presence HTTP Server. The difference is that Presence is no longer involved in running the Tasks, this is done entirely within Tomcat.