Difference between revisions of "Custom Nodes"
| Line 26: | Line 26: | ||
http://www.international-presence.com/wikidocs/images/new_custom_node_1.png | http://www.international-presence.com/wikidocs/images/new_custom_node_1.png | ||
| + | |||
| + | === Input Components Screen === | ||
| + | |||
| + | This screen allows you to set up the custom node's input components, which is where users implementing the node will enter the input parameters. | ||
| + | |||
| + | Input components can be of the following types: | ||
| + | |||
| + | * Text Field | ||
| + | * Password Field | ||
| + | * Radio Button | ||
| + | * Check Box | ||
| + | * Number Field | ||
| + | * Number spinner | ||
| + | * Text Area | ||
| + | * Combo Box | ||
| + | |||
| + | Components can be grouped together in separate tabs. | ||
Revision as of 10:56, 18 June 2014
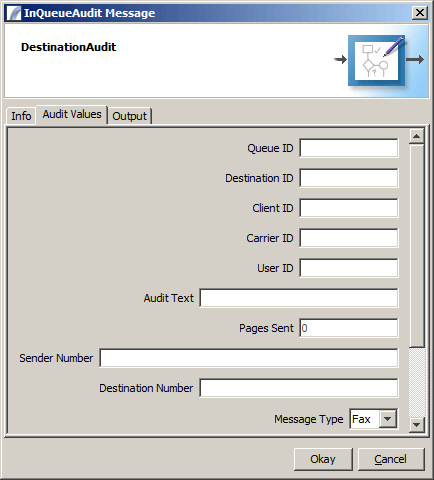
Custom nodes allow you to wrap a Presence Task or Java class inside a simple to reference node. This aids re-use and standardizes parameters.
http://www.international-presence.com/wikidocs/images/custom_node.png
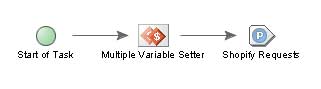
Typically, if you want to call a sub-Task in Presence, you would first have to make sure that the correct variables are being passed into the task. This process is often painstaking, as variable names have to match, and often requires one or more "set variable" nodes before invoking the sub-task (see below):
http://www.international-presence.com/wikidocs/images/subtask.jpg
This is a common source of errors which can be difficult to debug. By turning your sub-task into a Custom Node, you can require implementers to enter the correct parameters each time they use the node, as with any other Presence task node.
Creating a new Custom Node
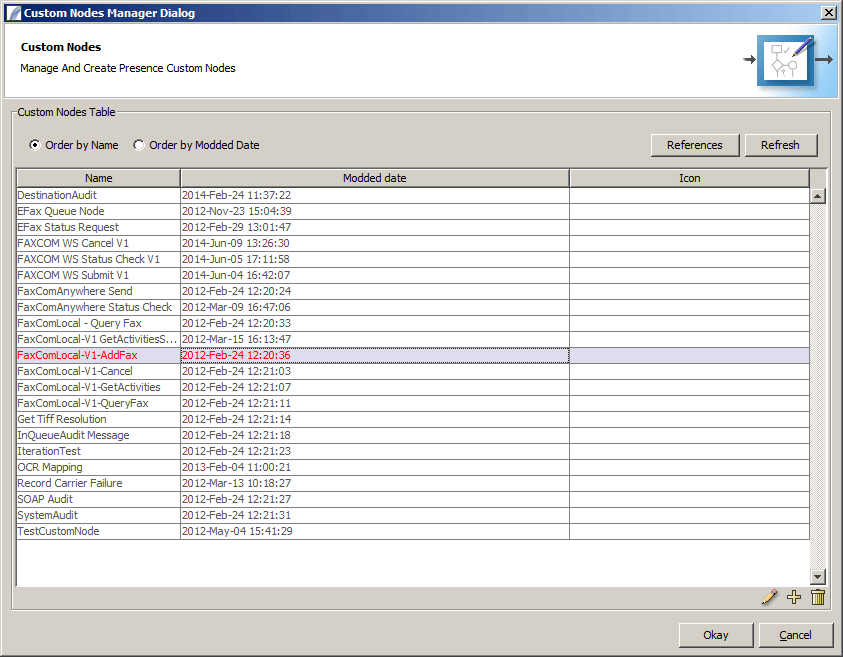
To create a new Custom Node for re-use, go to the Tools Menu > Custom Nodes. You will be presented with the Custom Nodes dialog box (see below):
http://www.international-presence.com/wikidocs/images/custom_nodes_dialog.png
The icons along the bottom have the following functions:
- Edit selected Custom Node
- Create new Custom Node
- Delete selected Custom Node
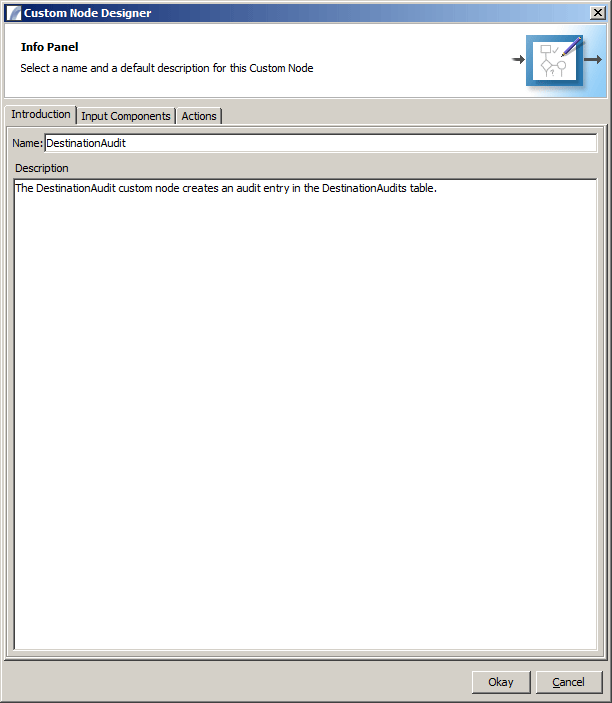
Introduction Screen
The first screen (Introduction) requires you to give the custom node a name and an optional description of the purpose. The example below is for logging audit messages to a database table.
http://www.international-presence.com/wikidocs/images/new_custom_node_1.png
Input Components Screen
This screen allows you to set up the custom node's input components, which is where users implementing the node will enter the input parameters.
Input components can be of the following types:
- Text Field
- Password Field
- Radio Button
- Check Box
- Number Field
- Number spinner
- Text Area
- Combo Box
Components can be grouped together in separate tabs.