Mail Scanner Nodes
Contents
Mail Scanner
The Mail Scanner Node can connect to POP mail accounts and retrieve emails, and then convert them into a Presence Data Table. This is especially useful for creating automated processes based on emails you receive.
The POP Scanner Interface
To create a new POP scanner in your Task, either drag Task Element labelled "Scan Mail Accounts" from the Data Access toolbox, or right-click on your Task and choose "Insert New > Mail Scanner > Scan Mail Accounts" from the pop-up menu.
POP Scanners created are not reusable. This means that while you can copy and paste a POP Scanner from one Task into another (or the same Task), changes made to one will not affect the other.
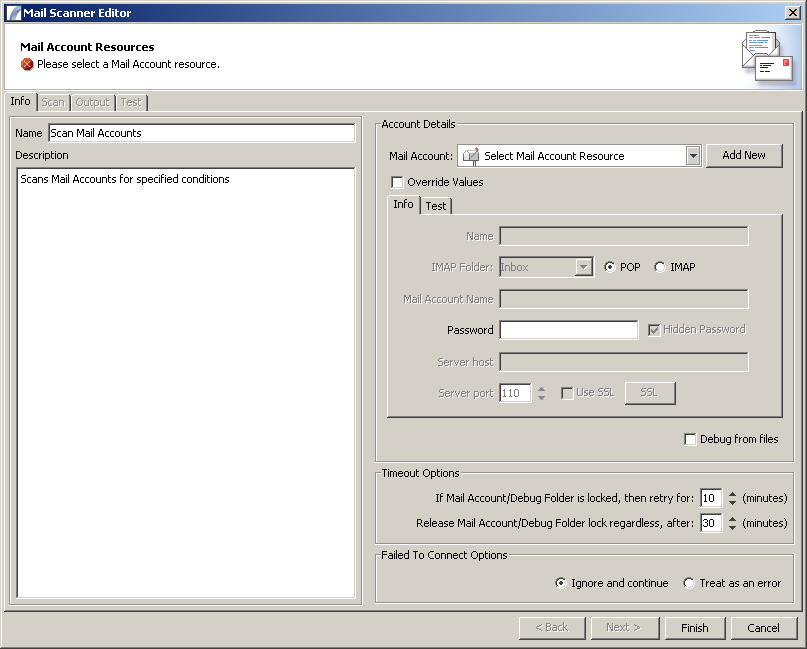
This is a view of the POP Scanner interface which will be displayed:
http://www.international-presence.com/wikidocs/images/pop_scanner_dialog_1.png
The Name and Description fields allow you to enter a descriptive name and short description of this item.
Account Details
This is the POP Mail Account Resource that you wish to connect to, which stores details such as the IMAP folder, Account Name, Password, Server Host, Port and security options. These can all be overridden by checking the "Override Values" checkbox.
Test Tab
If you want to run a test to check that your settings are correct and you can connect to your mail server, click on the "Test" tab, then click the "Test" button:
http://www.international-presence.com/wikidocs/images/pop_scanner_test_panel.png
Timeout Options
This allows you to specify that the mail scanner should time out after a period of time if the mailbox is locked, or if it is unable to connect.
Failed To Connect Options
When a timeout occurs, the Task can either raise an exception (which will be caught by an Error Handler Node if one is present) or it can continue anyway. Select the option here that best suits your Task.