Manage Users
Manage Users
To access the Manage Users dialog, select Manage Users and Passwords from the Security dropdown menu in the administration client. Alternatively click the icon in the top toolbar:
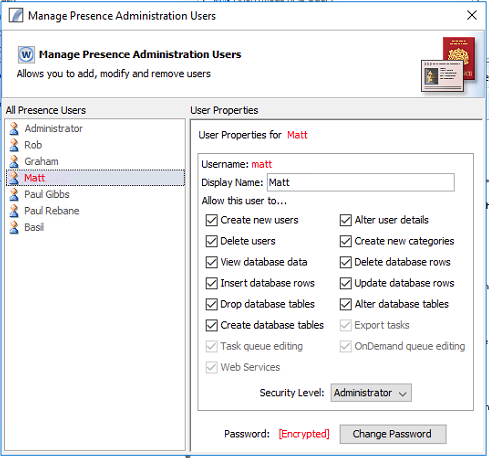
The Manage Users dialog has two parts - a list of existing users on the left, and user properties on the right hand side:
To edit an existing user, select the user from the left hand pane. The properties will update accordingly.
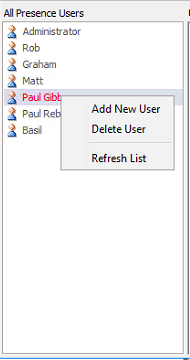
Right-clicking on an existing user or in a blank area will launch the following popup context menu:
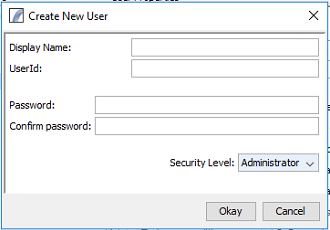
Add New User
'Display Name:' A friendly name for the user (typically their first and last name) 'UserId:' The username they will use to log on 'Password / Confirm Password:' These values must be identical. This is the password the user must enter to log in. 'Security Level:' This controls which users have access to modify permissions for other users and affects default permissions.
Delete User
This causes the selected user to be permanently deleted.
Refresh List
This will refresh the list from the database.
Architecture > Client Components > Manage Users
| Heartbeat Server | Database Server | Presence Server | HTTP Server | Remote Program Call Server |
| Administration Client | Heartbeat Client |


