Send Email
From PresenceWiki
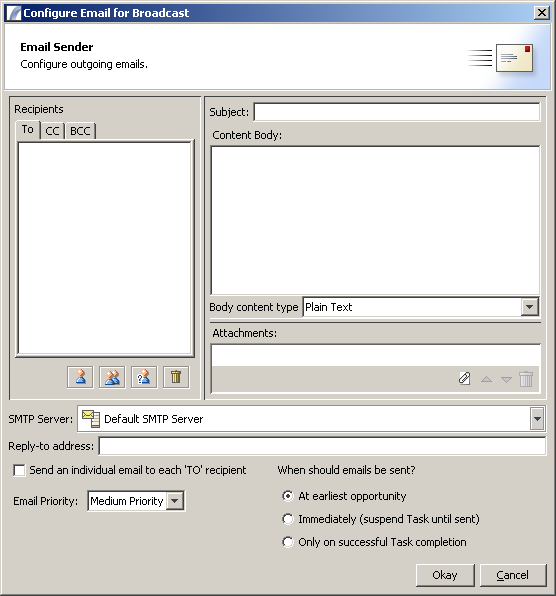
Send Email Node
This Node is useful for sending emails over SMTP. It allows for HTML content, attachments and multiple static or dynamic recipients.
http://www.international-presence.com/wikidocs/images/send_email_dialog.png
Recipients
There are three options for adding recipients:
- Single Recipients Click the left button to view a pop-up window with all available contacts. Drag contacts from this window into the Recipients list.
- Group Recipients Click the second button to view a pop-up window of recipient groups. Drag groups into the Recipients list to add them.
- Dynamic Recipients Useful if the email address or name is populated from a database. Click the third button to launch the Dynamic Recipients dialog, which allows you to enter the name and email address or Presence variable or column name referring to them.
To remove a recipient click the small trash-can icon (the fourth button under the Recipients list).
Email Contents
- Subject: This is the subject line of the email.
- Content Body: This is the body of the email. By default emails will be sent as plain text, however you can also enter HTML here - if you use HTML ensure that the Body content type is set to "HTML Text".
- Body Content Type: This can be Plain Text or HTML text - see above.
- Attachments: This lets you add attachments to the email. Click the "New" icon to add an attachment. When prompted for the file location, you can enter a dynamic reference - e.g. :var{ATTACHMENT_LOCATION}. If there are multiple values for the dynamic reference then multiple attachments will be added.