Fork Execution
Fork Execution
Many of our customers have said to us "We don't like your forking behaviour". That is why we developed the Fork Node.
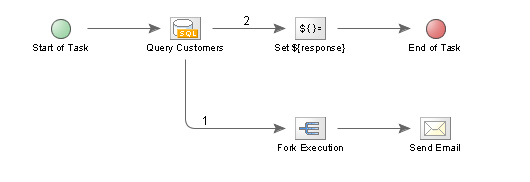
The purpose of the Fork Node is to create a separate background Thread for subsequent Nodes. For example in the following Task:
Here's the scenario: An On Demand Task is called via a Web browser on your intranet, whose purpose is to email each customer with a message that you have supplied via a form. If there are only a hundred or so customers, this is no problem - the Task can send the email and return a response to the Web client with little delay.
The problem with this approach is that it isn't scalable. What happens if we have 5,000 customers to email? Or 500,000? As the numbers increase, our intranet user has to wait longer and longer for the Task to complete.
This where the Fork Node comes into its own. We can return a response to the Customer (the Set Variable node in the Task above), and then initiate a separate process to send out all of the emails.
Debugging Fork Nodes
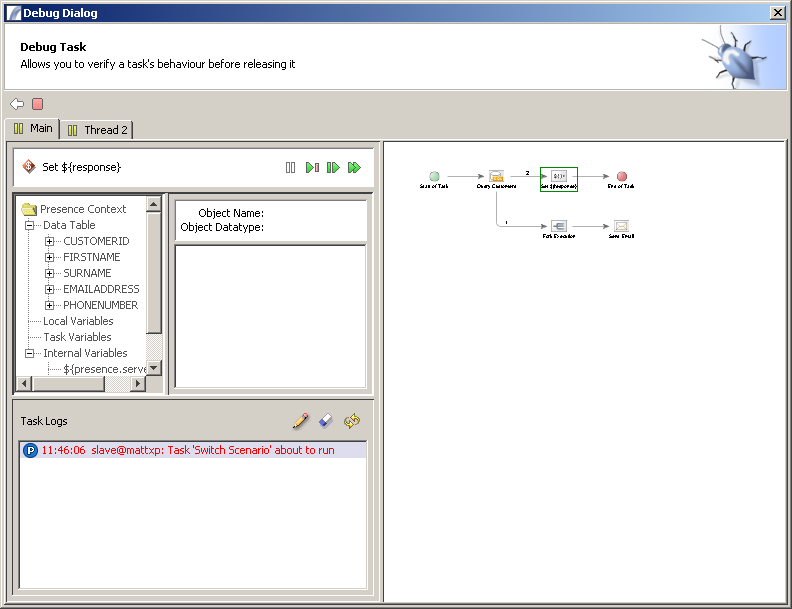
When debugging a Task with more than one thread, we notice a difference with the Debug Dialog:
As you can see, once the Task has passed the Fork Node a new Tab is added at the top left, which allows us to step through the two threads separately. Clicking either Tab shows us the current execution position of each Tab independently.
See Also
Task Elements > Flow Control Task Elements > Fork Execution
| Schedule Nodes | Decision Point Nodes | Start of Task | End of Task | Error Handler |
| Throw Exception | Passive Node | Log Entry | Sleep For n Seconds | While Node | Loop Node | Exit Loop Node | |Switch Node |
| Fork Execution | Join Forked Threads | Start Synch Block | End Synch Block | Event Notification Nodes |

