Schedule Nodes
Contents
Schedule Node
Schedules allow you to specify when a Task should run. This is useful for queued Tasks that need to run at certain times of day, certain days of the week, or certain days of the month - or combinations of these.
Schedule Nodes are re-usable. This means that you can create one Schedule Node (for example to run at 13:00 on Wednesdays) and use it in multiple Tasks.
To create a Schedule Node, first ensure that you have selected a Category other than the root (Presence) category. Right click in the "Flow Control" toolbox and select "Create New > Schedule" from the pop-up menu. Below are instructions for creating your Schedule.
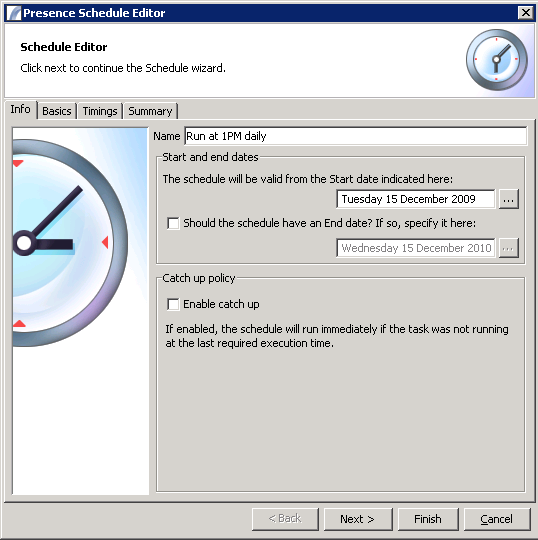
Info Screen
Here you will be prompted to enter the following information:
Name
This is a descriptive name for the Schedule. It may aid self-documentation to have the name offer a short description of the function of the Schedule - for example, "Run at 1PM Daily".
Start and End Dates
Do you want your Schedule to only operate between certain times? If so, select a Start Date and and End Date. Your Task will not run outside these dates. If you do not want an End Date, leave the checkbox labelled "Should the Schedule have an End Date?" unchecked.
Catch up Policy
This affects the behaviour of the Schedule the first time it is used within the context of a Task, or when the Server has been inactive for a time. If Catch Up is enabled and a schedule should have run in the past, but failed to do so because the server wasn't running, or if the schedule didn't exist, the schedule will still trigger.
This is a brief summary, however the actual workings are slightly more complicated - please read the more technical explanation of the Catch Up Policy.
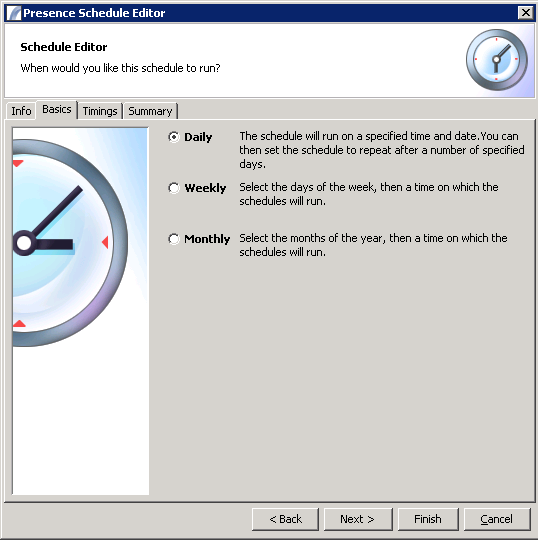
Basics Screen
This allows you to specify whether this Schedule should run daily, weekly or monthly. Depending on the option you select, you will be presented with a different display on the third panel (Timings).
These options are explained below:
Daily Option
The schedule will run on a specified time and date. You can then set the schedule to repeat after a number of specified days, or after a period of time has elapsed. For instance, daily schedules can be used for the following scenarios:
- At 12:00, 15:00 and 18:00
- Every other day at 14:30
- Every two days at 09:00 and 17:00
Weekly Option
Allows you to select the days of the week, then a time on which the schedule will run. Weekly schedules can be used for the following sample scenarios:
- Every Tuesday at 12:00 and 18:00
- Every other Wednesday and Friday at 14:00
- Every fourth Friday at 08:00 and 18:00
Monthly Option
Allows you to specify the months of the year and the date / time on which the Schedule should trigger. Useful for the following scenarios:
- First Monday of April at 09:00
- The 25th of December at 15:00
- The second Tuesday in June at 18:00
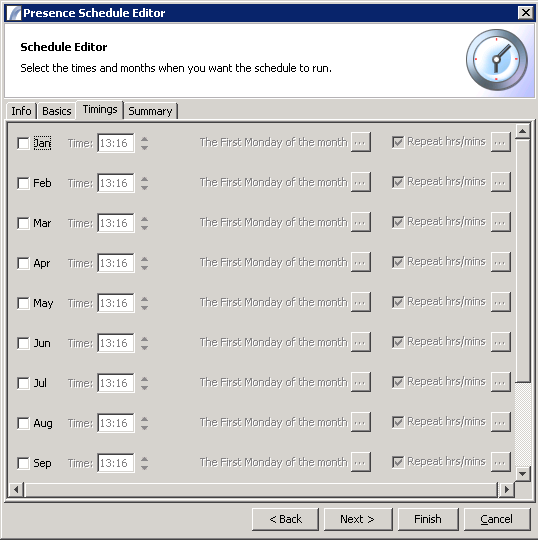
Timings
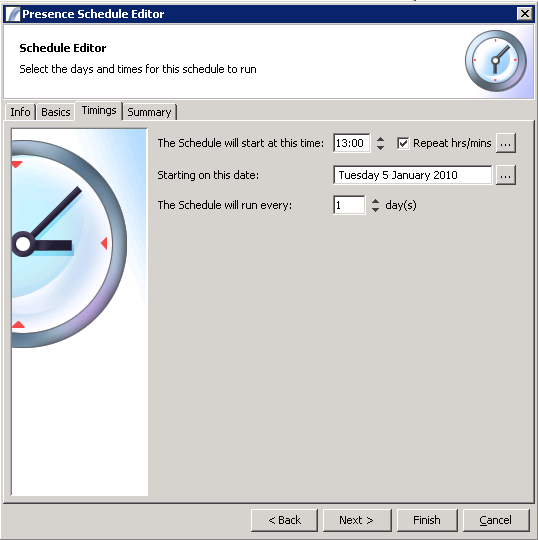
Depending on the option selected above (daily, weekly or monthly) you will be presented with the following screen when clicking the "Timings" tab (or click "Next" from the "Basics" screen).
Daily Timings
Schedule Start Time
This represents the first time the Schedule should trigger in the day.
Repeat Hours / Minutes
Allows you to tell the Schedule to run again after a period of time (for example, every two hours) and continue doing so until a specified end time (e.g. 18:00)
Starting On This Date
This is the earliest date the Schedule can run.
The Schedule Will Run Every....
This option allows you to tell the Schedule how often in days it should run. For schedules that run every day at certain times, leave this as "1". If you want the Schedule to run every other day, every three days, etc, adjust this value appropriately.
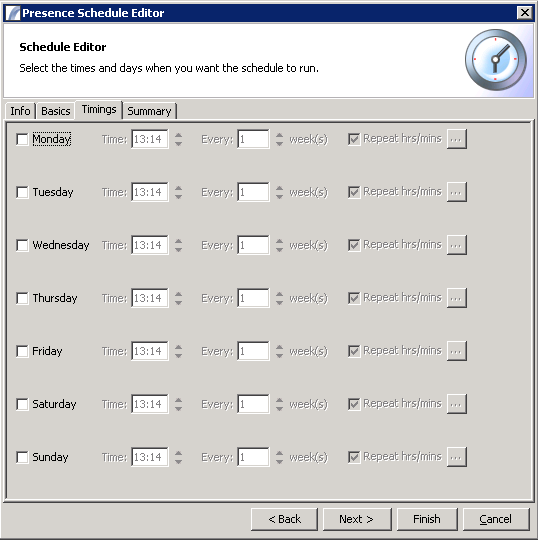
Weekly Timings
Select the checkboxes that indicate the days of the week you want this Schedule to run on. This will enable the time picker, the number of weeks to repeat, and the times to repeat.
Monthly Timings
Select the checkboxes that indicate which months in the year you want this Schedule to run. When a month is selected you will then be able to specify the time, the day of the month, and the repeat period for that month.
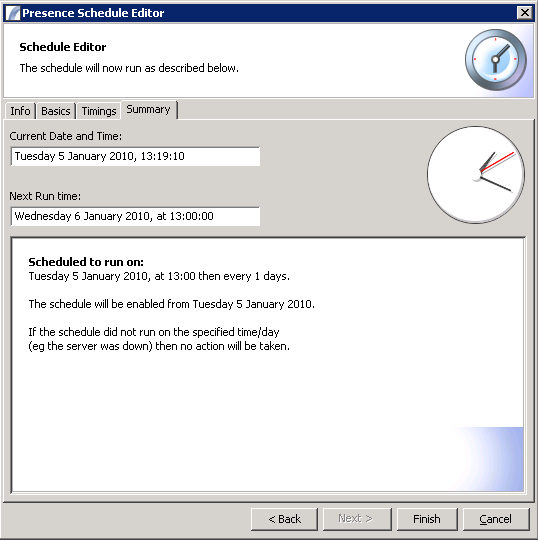
Summary
Here you will be presented with a summary of the options selected - this includes the next time the Schedule will trigger, and a textual description of the repetition logic specified.
Attaching a Schedule to a Task
The last thing to do before placing your Task on the Live Task Queue is to attach your Schedule to the Task. This is simply a matter of including the Schedule Node in your Task by dragging it from the toolbox. Here is an example of a Task that has a Schedule Node attached:
Now we are sure that the Task can only run at the times specified in the Schedule - in this case, every day at 13:00.
Combining Schedules
Although Schedules are very flexible, there may be occassions when you would like even more control over when a Task should run. For instance, you may want your Task to run every weekday at 11:00, but also at midnight on Sunday. In this type of scenario Presence allows you to combine, or "stack" Schedule nodes, as in the example below:
If the first schedule returns a negative result (i.e. it is not time for it to trigger), it will pass on the decision to the second schedule node.
See Also
Task Elements > Flow Control Task Elements > Schedule Nodes
| Schedule Nodes | Decision Point Nodes | Start of Task | End of Task | Error Handler |
| Throw Exception | Passive Node | Log Entry | Sleep For n Seconds | While Node | Loop Node | Exit Loop Node | |Switch Node |
| Fork Execution | Join Forked Threads | Start Synch Block | End Synch Block | Event Notification Nodes |
