Custom Data Formatter Standard Option
The Custom Data Formatter produces a tree-based text output based on the incoming Data Table. For example, consider the following table of data:
| Name | Country |
|---|---|
| Matt Pryor | United Kingdom |
| Graham Roberts | United Kingdom |
| Basil Prescott | United Kingdom |
| Richard Knill | United Kingdom |
| Lauris Cadey | United States |
| Paul Rebane | United States |
From a glance at the data we can see that although the values for the name field are all unique, the country field is not. It would therefore make sense, when presenting this data, to provide sub-headers for the country field. So, let's suppose we wanted to create an output that looked something like this:
United Kingdom
Matt Pryor
Graham Roberts
Basil Prescott
Richard Knill
United States
Lauris Cadey
Paul Rebane
This situation lends itself to the Custom Data Formatter. To create a new Custom Data Formatter, right click on the task edit view and select "Insert New > Custom Data Formatter". You can give the data formatter a name to aid your Task design, then select the type of document...
Contents
Type of document to produce
This allows you to select a pre-defined document type. The type of document selected dictates the initial value of the root element and the tags suggested in the suggestion provider.
The available types are:
- Generic Document (no default text or suggestions are provided)
- HTML Document (a basic HTML template is used as the default text, and HTML tags are suggested)
- PDF Document* (a PDF template is provided, and PDF markup tags are suggested)
- WML Document (Wireless Markup Language, in case you are building a WAP site)
- XML Document (For XML documents, less advanced than using the XML Document Writer).
Iteration Tree
The Iteration Tree tells the custom data formatter how to iterate over values in the data column. For our example above we want the formatter to first iterate over the available countries, and then for each country list the people that live in that country.
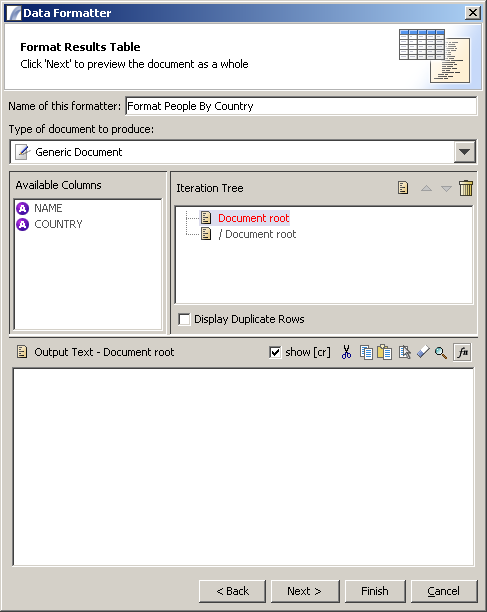
The first thing to do is to therefore drag the "COUNTRY" column into the iteration tree, at the "Document Root" which will then look as follows:
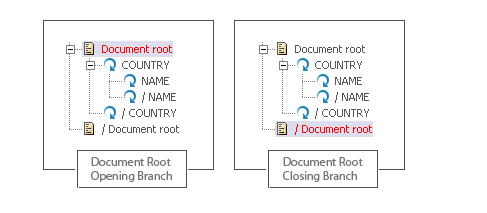
Note that there are two branches created - one called "COUNTRY" and another called "/COUNTRY". These are the opening and closing branches.
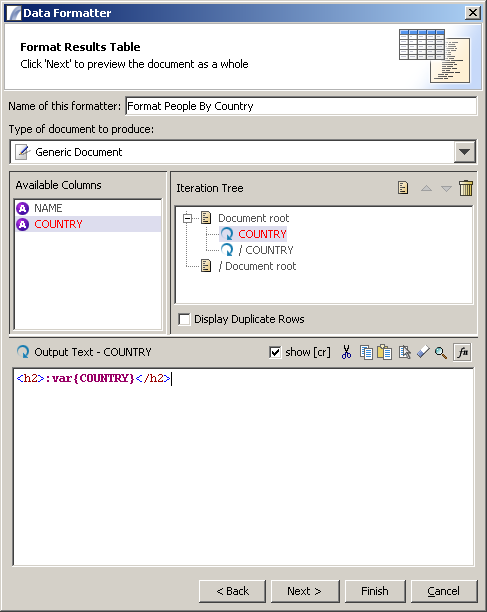
Each branch of the iteration tree can have text associated with it. This is the text which will be outputted at runtime whenever a new value for that column is encountered. For our example we want to output a bold heading with the country name, like so:
This text is associated with the "COUNTRY" branch as we want it to go above the list of people for that country. If the text were placed in the "/COUNTRY" branch it would appear after the list, as this is the closing branch.
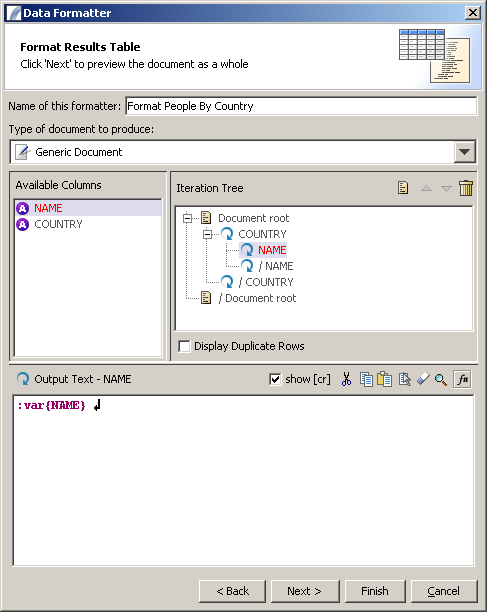
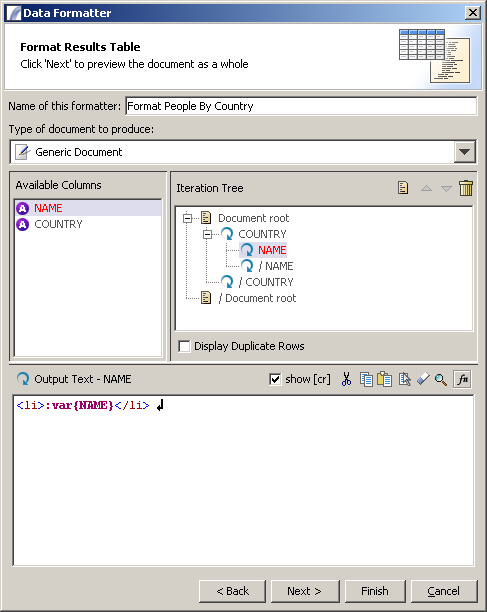
But we don't want to stop there. For each value of country we also want to produce a list of people associated with that country. So let's drag the "NAME" column into the tree as well - between the "COUNTRY" and the "/COUNTRY" branches:
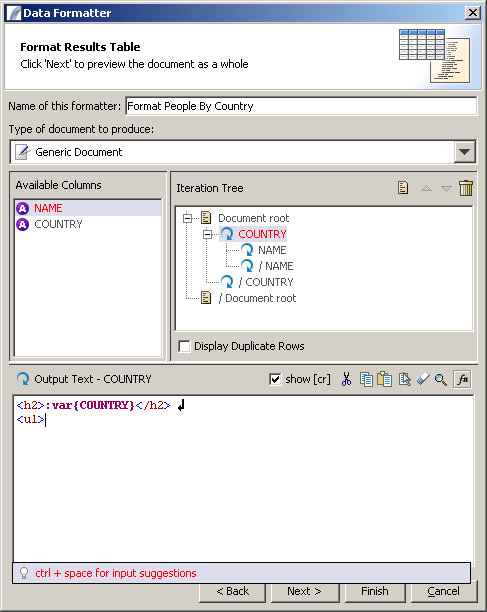
So far so good. This will now produce the kind of result we're after. But we can improve it by making use of the opening and closing branches. Click on the "COUNTRY" branch (the header for the COUNTRY column), and change it as follows:
Note that we have added an opening <ul> tag, which is an HTML tag meaning that an unordered list will follow. We now want to change our NAME branch to include the <li> tag (list item):
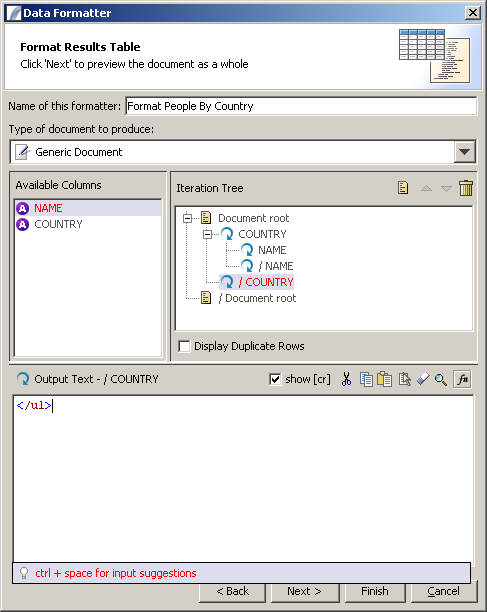
Because we have an opening "<ul>" tag in the "COUNTRY" opening branch, we also need a closing tag to match. We need to put this in the closing ("/COUNTRY") branch text field, so click on this node and fill out the text area like so:
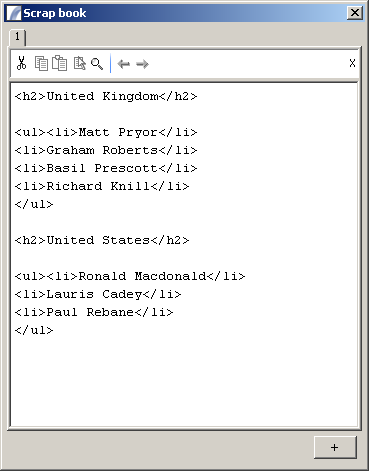
That's all we need to do. The final output will be something along the lines of:
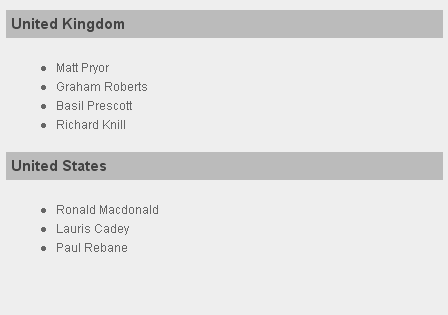
And finally, here is how this might be rendered in a web browser (with some CSS formatting):
Free Text
In addition to creating text which is associated with an opening or closing column branch, you can also insert "free text" in the document tree. To do this, click the "free text" icon. Free Text behaves like a column branch but will only be included once (for the parent branch). You can nest column branches within free text branches.
Display Duplicate Rows
By default this is unchecked, meaning that when duplicate records are encountered Presence will skip them, rather than repeating the same information. Check this box to do the opposite.
Document Root
The Document Root nodes represent the top and bottom of the outputted document. For an HTML page, for example, you could have the <html>, <body> and <head> elements in the opening branch and the closing </body> and </html> elements in the closing branch. In fact, if you select "HTML Document" from the "Type of document to produce" drop-down list, these values will be automatically inserted.
A more complicated example
An example of a Custom Data Formatter which uses more fields and makes use of the opening and closing tags can be downloaded from here:
http://www.international-presence.com/wikidocs/samples/create_invoices.zip
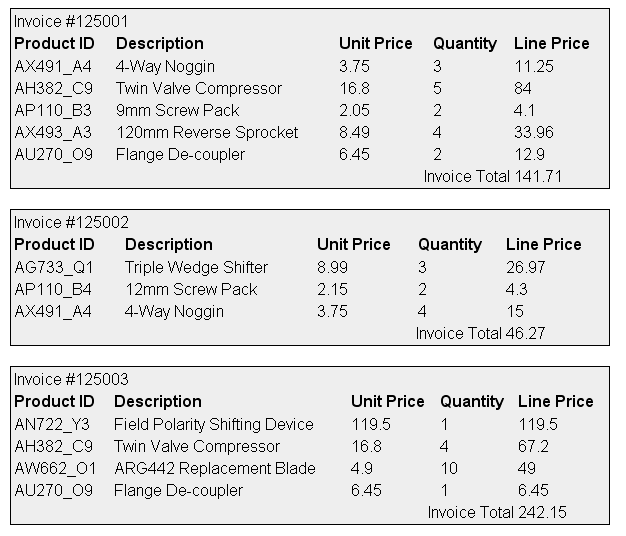
This takes a table of invoice data and uses it to create an HTML page with each invoice displayed as a separate html table, as in the screenshot below:
Here are a few ways to improve the output, try them yourself:
- Format prices with currency and two decimal places (e.g. £6.60 instead of 6.6) - hint: the &formatNumber function is ideal for this.
- Make the invoice number larger and bolder
- Create a horizontal line above the invoice total
See Also
Task Elements > Data Format Nodes > Custom Data Formatter Standard Option
| CSV Writer | HTML Table Writer | Basic XML Writer | XML Document Writer |
| XSLT Processor | Padded Text Writer | Custom Data Formatter Standard Option | Custom Data Formatter PDF Option |
| Custom Nodes |
